Sunday, January 22, 2012

Introduction and Baby's First Year album


First I want to introduce Emma Nicole Versprille. She was born on December 15th weighing 5lbs 8oz. She is so much work but so much fun! Love her!

Now on to the crafting!

This is a gift for my sister-in-law. She is having a little boy, due at the end of February. I wanted to make something homemade for her baby shower. I think this came out great. I had to improvise a bit on this one but in the end, it worked out.

I used the Bazzil Basics Totally Exposed 8" x 8" album. It has a three ring binder inside and a finished outside. The chipboard pages are sold separately and have cute tabs in different shapes. I used the Java Walnut ink antiquing spray found at Michael's, to color the inside cover, the edges and the sticky back canvas. It is a really nice rich brown.

The paper collection I used is the Baby Steps collection by Simple Stories. I cannot say enough great things about these papers. They are so beautiful, easy to use and give so many options for journal spots and embellishments. They are a nice quality. I love them. They are also one of the only baby collections that can honestly work for a boy or a girl. Love, love, love!

This album came together quite easily. Of course I made it in the days surrounding my due date. So, I was on a clock and really worked to get it finished before I went into labor. I am really happy with the way it turned out and I hope my sister-in-law loves it too!

Tuesday, December 27, 2011

Baby Crib Mini Album

Ok, this is one of my favorite albums! It is mainly just photo mats but I just love the simplicity in that. It will really help the photos shine. I wanted a place to put pictures of my baby sleeping. Just sleeping. Baby's look so adorable and angelic when they sleep. When I saw this chipboard album on Bona's blog Live Love Scrap - I knew it would be perfect. Thank you Bona! She designed this die herself for her Accucut machine.

Because it was so simple, it came together very quickly. A great gift for a baby shower! I will do another video of this once I have pictures inside. It looks so great in her room and I love that it stands up!

I hope you like it!


Tuesday, December 6, 2011

Welcome Home Baby Album

I told you I would be back!

Today I want to share my first baby album for the little sprout. Obvioulsy there are not pictures yet since she is not here yet! I still wanted to share it with you.

I got this album from Kathryn @ Life on the Scrapbeach She made a Summer album with this chipboard album and I saw the chipboard and knew it would be perfect to celebrate the first day we bring our bundle of joy home. Thankfully, she was selling them! Thanks Kathryn!

I decided to use the Graphic 45 Once Upon a Springtime collection again. I wanted to use the non fairy patterns because I liked the soft colors. I also had enough left over from the 8x8 pad after the closet organizers to make this album without breaking into the 12x12 papers too much.

I also incorporated some things I had in my stash in the baby theme in order to keep it baby instead of springtime theme. These include the Little yellow bicycle Baby girl journal tablet, a baby journal notebook by and lastly the Baby Steps 6x6 pad by Simple Stories. I used these for little touches here and there. This with some pearls, lace and flower made this album come together.

I hope you like it! I think it will look adorable in her room as will she!


Sunday, October 16, 2011

Do you remember me???

Hi everyone! I know, I know - I have been gone for quite some time now. Though, I have no excuse, I will try to explain. I have been overwhelmed by the new life changes that have happened to me this year. I started a new job in March and found out I was pregnant on April Fool's day! I was shocked as you can imagine. Excited but shocked! Needless to say I have been tired and worn out and not crafting that much. I also lost my craft room to the baby room,. Packing up all of my stuff into boxes messed with my creativity. I am now sharing the office with my husband. So far it is working out fine. I told him we should get a partner's desk, but I think that was pushing it, I mean I have already taken over the entire closet. Only downside so far, I no longer have a TV in my craft space. You can tell by the name of my blog that I love to watch TV while I craft. but I am making it work. I will make a video of my new space soon.

Speaking of my hubby, he yelled at me today when he found out I have been neglecting you so here I am! I have been doing a few projects for the baby so I will begin to share those with you now.

We are having a little girl. We don't have a name yet so don't ask! LOL! My hubby was concerned that we were only going to get baby clothes sized for a newborn. We was worried that out darling baby girl would be naked once she turned 6 months old. To ease his fears I decided I wanted the closet separators for each clothes size. I saw them at the baby store but they were so generic and boring. Enter my google search for homemade closet dividers. I found some made online by a fellow crafter. See my inspiration HERE!

Are those not adorable??? I loved them - only one problem. They were for a little boy. I knew for mine, I wanted to use the Graphic 45 Once upon a Springtime collection. I had been saving it until I go pregnant someday - who knew it would be so soon! Thanks goodness I am having a girl because this would not have been a manly collection to use for a baby boy!

I embellished with recollection flowers, E-line pearls, ribbon and more. I hope you like them. Easy to make, fast and pretty inexpensive. These would be a great gift for a baby shower!


So, I am back! I am sorry I deserted you, it was't intentional, life just got crazy! I will try to post at least twice a month, hopefully more often! I am due in 7 weeks and have a few projects I need to complete before the baby takes over our lives. I promise share them all with you!

Sunday, March 27, 2011

New cubicle decorations

So, I know that I have gone MIA again. It has been a big adjustment switching jobs. I am loving my new job. It's a lot of new things to learn but very exciting. I have been using the study skills I teach at Sylvan. Fun!

With my switch from an office to a cubicle, I needed to find a way to make it pretty. First step was to do a little recon. I checked out the themes others had chosen. I saw cubes with plants, children's pictures, Mr. Potatoheads (yup! with differnt hats and even a Darth Vador head!), transformers, sports posters and more. I didn't see any with crafts. YAY, a way to stand out!

I have decided to start slow. My first projects are as follows:

I made a post-it note holder. I used the basic grey origins collection. It came out super cute and looks great in my cube. I might need to add some ribbin to the top but I just didn't have the color I needed. Sorry if the pictures are blurry. I have discovered I am a terrible smart phone photographer.


Next, I decided to kick my price book up a notch. I have two 3 ring binders in my cube. One for pricing and one is a reference book for all I have been learning. I altered them both with minimal supplies. You can't put too much as they fit into a plastic protector. I used a piece of patterned paper and a few Recollections flowers. I added a bit of Tim Holtz wild honey and rusted hinge ink to pair the blue with orange.
For the reference book, I added a grungeboard butterfly inked with Tim Holtz weathered wood distress stain. I won some blog candy from him and he sent me 4 free bottles of stain! I just love that man! This stuff is great! I love how easily this covers! I added a Pearl for the body. I also added a few masked butterflies with tiny pearls as well. Of course I had to add something to the spine as well. I love how they turned out!


I have received a few compliments and I am pretty usure a few might think I am crazy to make a 3ring binder look pretty, but I know you all will understand!
Anyway, you will also be proud to know that I have started my Finn mini album! A long time coming. I will share it when I am done. If my office mates thought I was crazy before, wait till they see a mini album up close and personal.
Published with Blogger-droid v1.6.8

Sunday, February 13, 2011

Welcome Baby!

I hope you all had a great Valentine's Day!

Today, I want to share this baby girl mini album with you. My mother-in-law asked me to make this for an upcoming baby shower. I had so much fun making this album. Most of the baby stuff I make is for my nephews. I hardly ever get the change to get all pink and girly.

I wanted the album to be big enough for large photos. I made an 8" x 8" book. All of the photo mats in this album are meant for 4" x 6" photos. This way there will be no trimming or work involved making it super easy for the mommy to be to add photos. I also included a cheap tape runner.

I used the Nana's Nursery Baby Girl paper collection, Little Yellow Bicycle journal tablet, Recollections products and more. I finally got some sticky back canvas! So much fun. I love the way it came out! Check out the video below. Thanks for watching!

Monday, February 7, 2011

My Dad Rocks!


So, I know I have been MIA lately but for good reason. I got a new job! I have been crazy busy working two jobs and searching for a new one. It takes so much time to apply and follow up, interview etc. Worth it though! I have a new job and I am beyond excited and proud of myself. So now I can devote a bit more time to crafting and blogging!

I want to start by sharing one of my favorite Christmas presents with all of you. I have been struggling for what seems like forever to find a great ink storage solution. I had been using the Tim Holtz large metal ink case. However the minute I tried to make it cuter with fragments - it broke! Boo!

My dad decided to make me an ink solution for Christmas. I gave him the dimensions of my inks and how many slots I would need. He built me the best thing ever! It holds all of my inks and then some. I have a few inks that I never use but they are in there for now until I get a new ink to replace them with. So it rocks to have all of my inks right in front of me at all times. The best part though is the blocks. Blocks?? Yes, blocks! My dad is a genius and also a bit like Monk. He wanted all of my inks to be hanging over the edge by the same amount. He made blocks so my distress inks won't slide too far back, making it hard to grab. Then he made even bigger blocks for my small Stampin up spots and chalk cat eyes. Is that smart or what???

Check out the video below where I go through it and show how I store them. Thank you dad, you are the best!!!

Wednesday, December 29, 2010

Monster Train Pictures!

Here are the pictures for the Monster Train Books. Some people have been asking for the stories I wrote to go with them. I will upload them here.


I was asked by a few ladies to show some of the monster stories. Here are a few of them:

Lucy is on her way to the store. She has a lot of groceries to buy. She has to pick up food for her cat, milk for her cereal and candy Grapletons, her favorite sweet treat! Lucy loves to try food she has never tasted before. It’s like an adventure each mealtime and she is the explorer! Yum! Yum!

Manny is a mechanic. He is on his way to pick up white rim tires for his car. He got a flat yesterday when he ran over a banana. You might be surprised that a banana could cause a flat but this was a magical atomic banana and it blew a hole right in the tire! Good thing the train was traveling to Derbyshire today, that’s where his tire store is!

Sheldon is a children’s writer. He has just finished a new book about a sea turtle named Tumbles. Tumbles is a treasure hunter who is looking for a Pirate’s chest of jewels on Parrot Island. Sounds like a good book huh?

Fiona is traveling with her husband Doby. They are picking up a new puppy in Craterville. They are going to name her Jelly. Fiona is so happy to have someone to play with during the day when Doby is at work. She can’t wait to take Jelly on long walks in the park. Fiona brought a big bone on the train as a surprise for Jelly.

Doby is hoping the new puppy, Jelly, will like the dog house he just finished building for her. He likes to build things in his workshop. Doby painted the house blue with a red roof and got a pillow for Jelly to sleep on. He can’t wait to teach her to sit, fetch and roll over. Oh, what fun a puppy can be!

Betsy is a Baker. She bakes yummy cookies, cakes and pies. Today she is delivering some rainbow cupcakes to a children’s kindergarten class as a fun treat. They are learning about colors and Betsy thought this would be a tasty addition to the lesson.

Andy is an astronaut who has just returned home from a trip to Mars. He met a Martian named Marty. They decided to become pen pals. He is writing his first letter while riding on the train. He is so happy to have a new friend who can teach him about what it is like on Mars.

Molly is the owner of Right Kites. She builds kites for children to fly in the park. She loves to make them in all different colors and shapes. Her newest kite design looks like a butterfly and the string has green ribbons. It’s so pretty when it is floating on the wind up in the sky.

Bob is grumpy. He is having a bad day. Nothing seems to be going right. He is hoping a relaxing train ride will help change his mood. What do you do to get happy again if you are feeling sad or mad? Maybe we can help Bob turn his frown upside down.

Ronny is a fireman. He has a Dalmatian puppy named Dotty and is training him to be the new Firehouse mascot. He has to learn how to ride on the fire truck and how to slide down the fire pole. He is practicing riding on the train first because there is no siren. Ronny thinks Dotty will make a great mascot when he gets a little bigger.

That is just a sampling of the 24 stories I wrote. The boys love the books and even have favorite monsters! It just made all the work worth it when I saw my nephew ask for his mom to read through all of the monsters as soon as he opened the present. They were so into them! It made me so very happy! Thanks for stopping by!

Tuesday, December 28, 2010

Monster Train Books!

So, in September I thought to myself, "I love that Monster train mini by Laura Dennison! I should make Nate & Evan (my nephews) each one for Christmas this year!" I bought the pattern off her Etsy site (http://www.etsy.com/shop/followthepapertrail) If you have not heard of this woman - Go, Do Not collect $200 - GO to her blog and check her out!!! Her blog is http://followingthepapertrail.blogspot.com/ She has a creative mind like no other! Amazing!

Anyway, I bought the All Aboard train template off her Etsy site. It gives the dimensions and instructions for making a train mini album. I figured I would get started early so I wouldn't be down to the wire for Christmas. Sure I finished yesterday (12/21/10)! But it is finished!!!

I decided I wanted this to be a gift for the boys and not for their mom so I decided to change it up a bit! A mini album with tags, journalling and pictures wouldn't be as much fun for the boys as a Children's book about monsters riding the train! I decided that each monster tag would have a story on the back with the monsters' name and why they were riding the train. I figured this would be an interactive book for the boys! They could swap out passengers and have fun learning about different occupations and activities.

It was challenging to come up with 24 stories, names, not to mention have them fit in a 2" x 3" block when printed! It was fun though! I felt like J.K. Rowling (OK not really but still! LOL!).

I first made 2 trains - I wanted them to be the same but different. I used different paper collections to accomplish this. One is made using patterned papers from the Offbeat Collection from Basic Grey. Fun bright colors! The other train uses the Orbit Collection by Crate Paper. Once the books were completed it was time to start making monsters.

Each train holds 12 monsters - yes that means I had 24 MONSTERS to make! I decided to make things a bit easier on myself and used the 12 monsters Laura designed (instructions included in pattern) and invented 12 new monsters of my own! This was a lot of fun but mega time consuming!!! Each train has a mix of Laura and Amy Monsters. They came out great!

I bound the book with my Cinch from We R Memory Keepers. I LOVE this thing! It is so easy to use and in this case I needed the function of shutting off certain holes. It worked great! I also decided to laminate the tags so no monster parts would come off when going in and out of the pockets. Plus they slide in and out much easier now.

As you can tell, I am just thrilled with how they came out! I know the boys, ages 3 and 5, will have no idea how many hours I spent making these but I hope they will get a few hours of joy from them! Thanks so much for joining me! More train pictures to come soon! Happy Holidays!

Tuesday, December 21, 2010

Bad Busy Blogger!

OK, I am slapping myself on the wrist and shaking my head at myself! I know it has been SOOOOOO long since I have blogged. I have been so busy it is ridiculous! What have I been up to you ask???

I have been sick
I have a second job at Sylvan Learning Center
I have a bazillion holiday presents to make
Can't forget those Christmas cards!!!
Making caramel candy with my grandmother
Planning and having the nephews over for Christmas Crafts
Decorating for Christmas
Making kits that no one buys

And so much more!!! LOL!

Yes, I have fallen into the trap of putting too much on my plate! I am almost done and only have a small bit of my nephews' gift left to finish, (4) 10 pack of cards to finish, and a recipe box to alter! Don't worry friends, I have a whopping 4 days till Christmas! Plenty of time - maybe I should make a few layouts too - LOL JK!


Bonus for you...I have so many projects to share with you all! Kids crafts, cards, books, boxes and more! I will post the project that has been in the works since Early September tomorrow! So look out for that!

Hope all of you are slowly crawling out from under the Holiday pile of stuff to do! What projects are you most proud of this year?

Thursday, December 9, 2010

Ornament Mini Kits!

So I think these are one of the cutest things I have ever made! I love them! I have these kits available on my Etsy site! I have used the American Crafts Merrymint and Cosmo Cricket Jolly by Golly paper collecions. I have one of each a boy and a girl kit in each style. They are super quick to put together and the result are just ADORABLE!

They are also super versatile. They can make a mini album, an ornament mini album that hangs on your tree, (6) ornaments, (6) - Gift tags. Talk about cool! Check out the video below where I share what I created and the other videos where I go through what is included in the kits.

Check them out on my Etsy site! www.amyvlovestv.etsy.com Thanks for stopping by!


Monday, November 29, 2010

Specialty Christmas Kits!!

I am so excited to share these (2) - Specialty Christmas kits! These are LOADED! They were designed for the photo tray as well but would also be a great kit for a mini album (just ass chipboard!). These are loaded with Tim Holtz and K and Company goodies. These are designed to be more decorative with only 1 or 2 photos. Check out all the crafty goodness in these kits on the video below! Tons of pictures over at my etsy store of everything included in the kits!

These are available right now on my Etsy site HERE. You can also click the link on the side bar of my blog.


Also, be on the look out because Sunday I will be adding the CUTEST kits to my store. That's right, Baby First Christmas kits for both Baby girl and Baby boy in both non traditional and traditional colors. These will be made using the Sizzix Dress die and the Overalls die. Wait till you see them - they are ADORABLE! These can be either mini albums for decoration or ornaments and will work for children of all ages!

Saturday, November 27, 2010

Christmas Kits

So I have been working hard on making kits for Christmas! I love this holiday above all others and I just know you will all love what I have come up with for my Etsy store!

I have designed (4) Holiday kits for the 7 Gypsies Photo tray. These are made to capitalize on photos! These include patterned papers, cardstock, photo mats, photo frames, ribbons, altered papers, embellishments etc. These are an economical way to make a gorgeous home decoration for Christmas. Check out the video below for more information. Here is an example of what I did with the kit!


Oops! i forgot to add the part where I show what I did with the kit. Here is the video showing that!


These are available right now on my Etsy site HERE. You can also click the link on the side bar of my blog. I also have (2) - more 7 Gypsies Photo trays in my store as well, just in case you want to pick one up to go with your kit!

The video for the Specialty kits will be up tomorrow! If you can't wait - they are available at the store right now! I hope you check it out and get in the Christmas spirit with some great crafting kits! Thanks!

Thursday, November 25, 2010

Gobble Gobble!

HAPPY THANKSGIVING!!! I am thankful for all of you who read my blog and inspire me. You rock! I hope everyone has a safe and happy holiday.


MySpaceAnimations.com

Animations provided by MySpaceAnimations.com


(Thank you to Myspace for the animated Turkey image!)

Tuesday, November 23, 2010

Fern's BIG Giveaway!

Check out Ferns' Big giveaway! She si giving away a Big Shot!!! Can you believe it! Be sure to check her out and post a comment for a chance to win. Tell her you heard about it from me!!! Thanks again Fern! Find her blog HERE at fernsfrills.blogspot.com. Her Youtube name is fernlintner65.

Sunday, November 21, 2010

Every Girl Needs a Great Dress!

Today I have the cutest project to share! I am sure you all have seen these dress minis before. This was my first. I am so in love with these, you have no idea! It is made with the Dress die from Sizzix.

I made this mini for my friend Laura who is coming over to scrap this weekend. She has the sweetest little girl named Georgia. I just wanted to give her a small gift. I thought this would be a great opportunity to get girly. I don't often go super girly so this was a fun escape from my normal scrapping. I loved playing with pinks!

I had fun with flowers, stickles and ribbon. It turned out so adorable it made me want a little girl of my own! I am making a few of these kits for Christmas for both girls (dress) and boys (overalls). The theme will be baby's first Christmas (would work for any aged children.) So keep an eye out for those in the next few weeks.

I really hope Laura likes the mini. Thanks for stopping by!

Wednesday, November 10, 2010

Treasure...ARG!

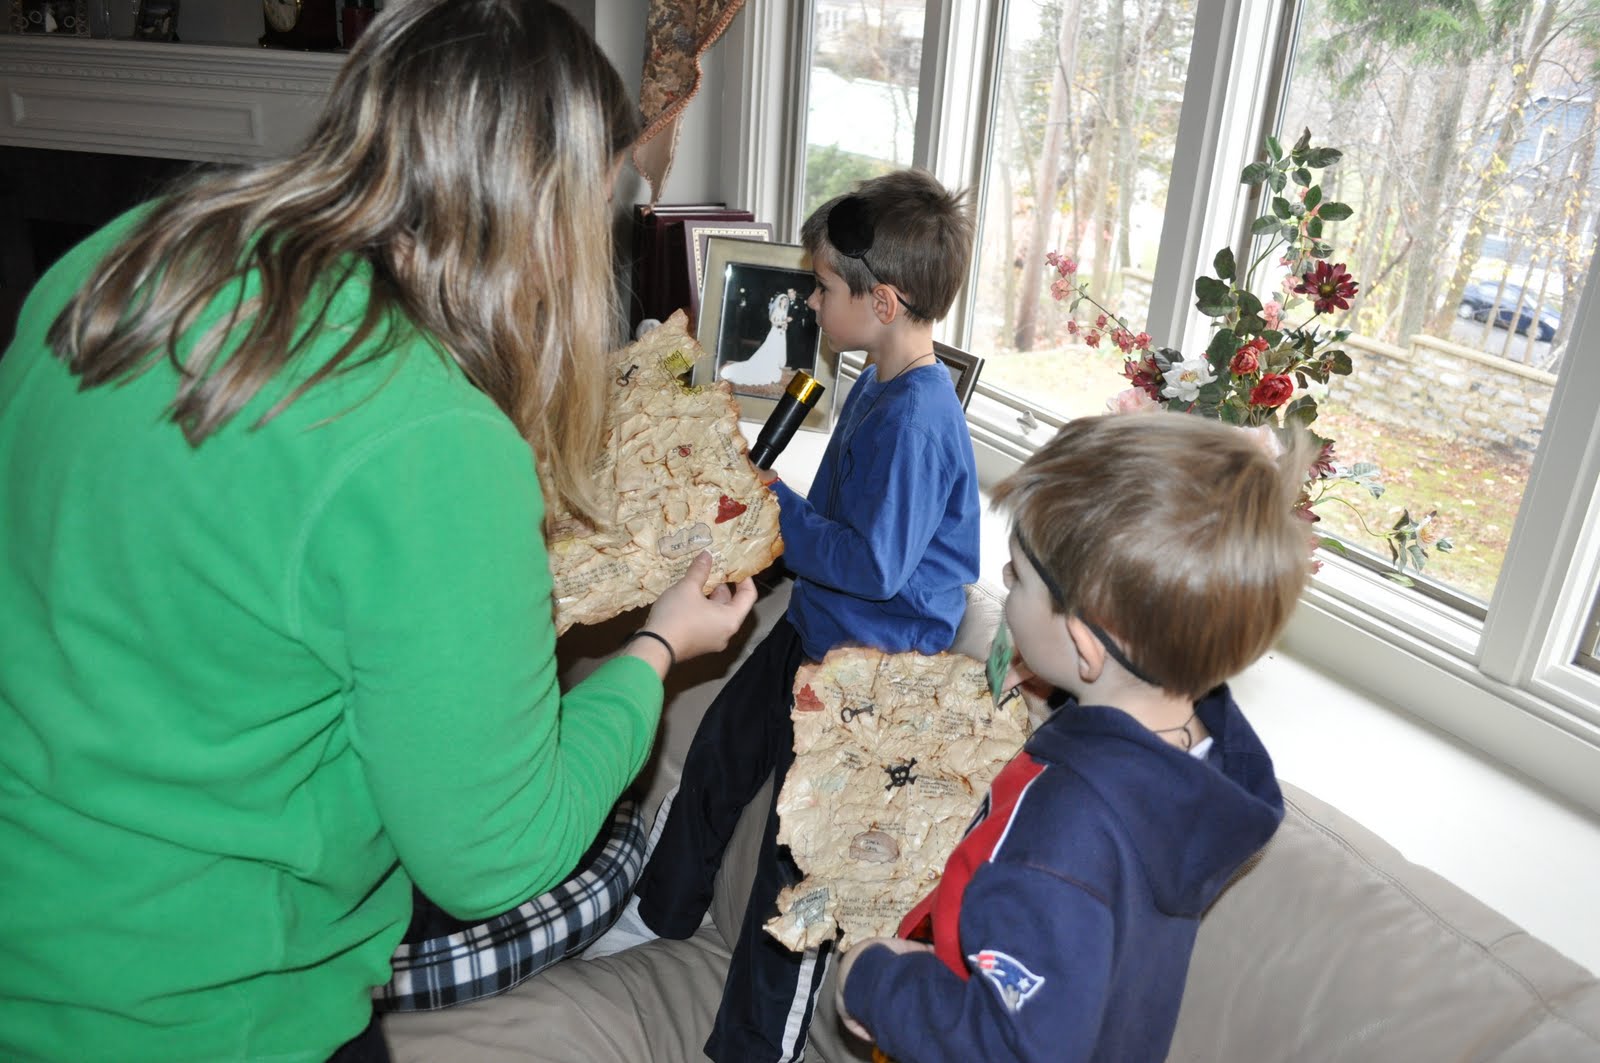
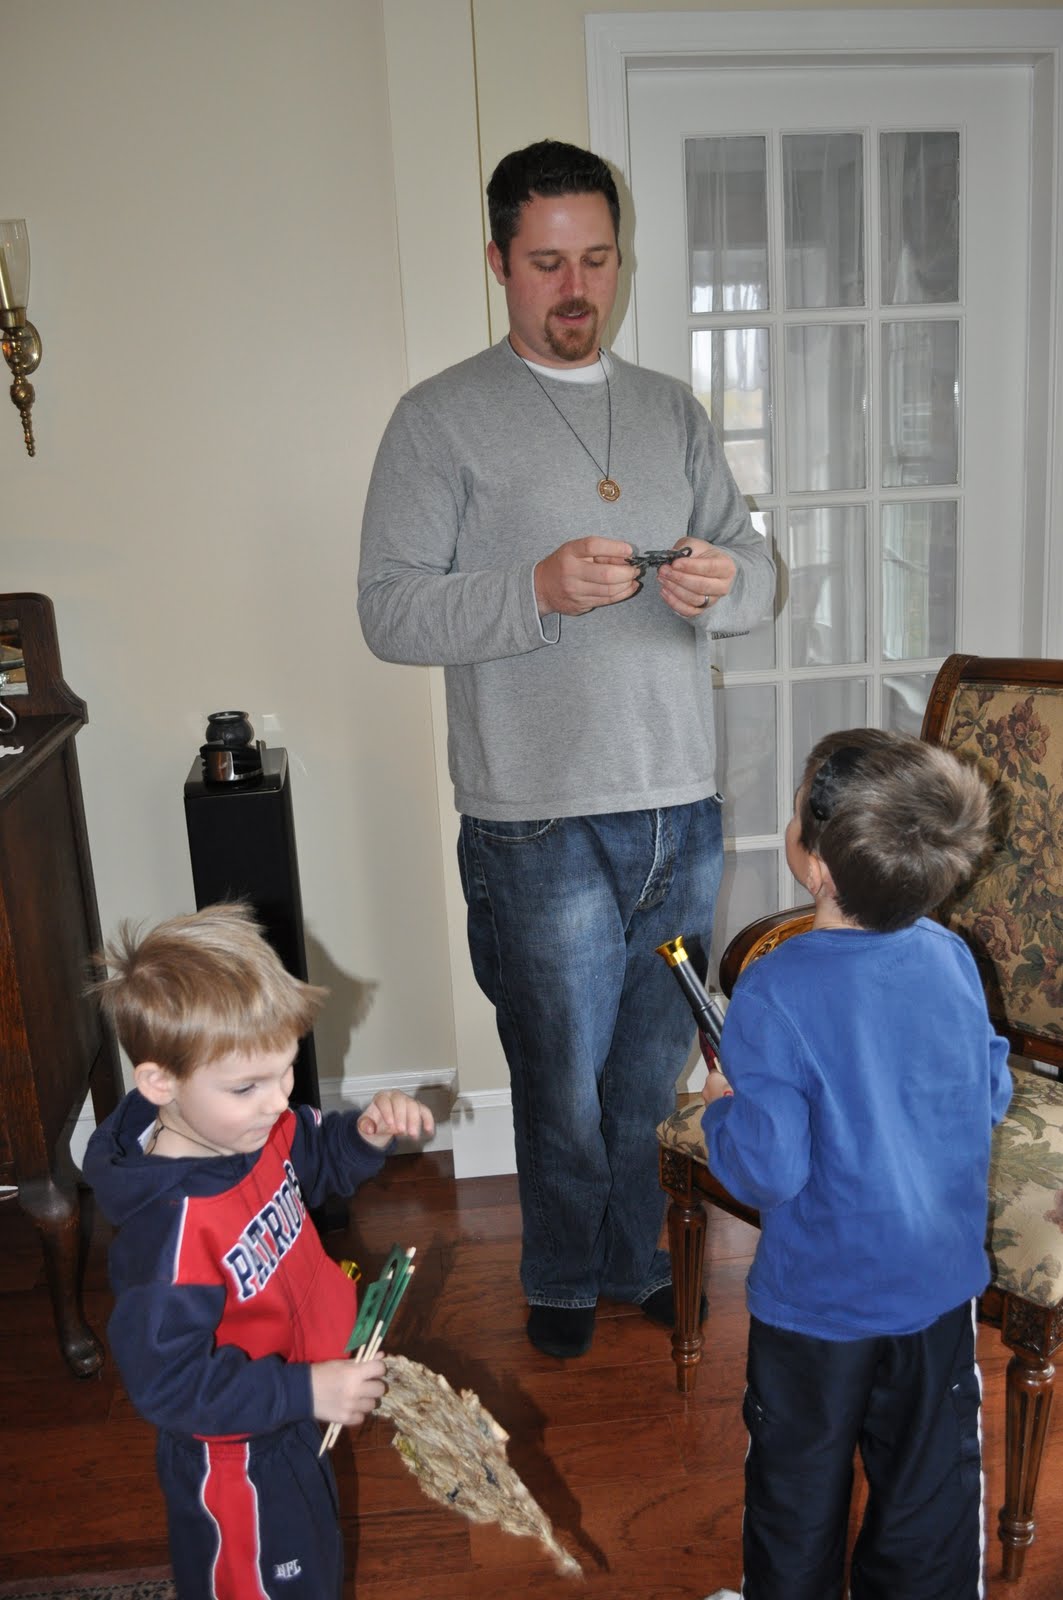
Calling all Pirates! Here is a project I recently completed. Hubby and I babysat my nephews this weekend. Nate is 5yrs old and Evan is 3. I was looking for things to do with them besides play cars ALL DAY! LOL! I decided to search "Things to do with kids ages 3-5" on the Internet. One of the sites said to do a treasure hunt and make a treasure map. I decided to give it a try. I took a piece of cheap white cardstock 12" x 12". Laid out my parents' house and figured out where I wanted to hide the treasure and worked backwards. I made keys out of grungeboard and flags with a pirate stamp. I had so much fun making these maps and decorating them. I even tea dyed them! I think they turned out great and since I covered them with multi-medium (mod podge would work too), they will last a while and they can keep them. They each had a look out telescope, compass and an eye patch. They looked adorable! Check out the pictures below!


The treasure hunt went great. They both love singing the pirate song (yo ho yo ho a pirate's life for me!). I think Arg is one of their favorite new words. I was their guide - reading the map. Hubby was the gatekeeper of the treasure. They had a ball and it provided a solid 45min of activity. Add to that the pirate themed play after that and we had a day full of adventure. They packed up the ship for a long journey, they played captain and first mate games, they locked my hubby in the dungeon and he tried to escape. Hubby was great with them. I love seeing him interact with kids. So cute!

Anyway, this was a fun activity, I got to play with my scrap supplies in a new way and above all...I am a cool Aunt (or at least my nephews think so!) Love them!


Friday, November 5, 2010

Birthday Present

Here is a birthday present I made for my sister-in-law. I used another one of the 7 Gypsies photo trays. This is made with the Kaisercraft Up, Up, & Away Collection. I made this completely removable as well. I will give my sister-in-law swap outs for Christmas. This project is fast and super easy. I love the final result. I have to start my next theme (Thanksgiving or Christmas) for my swap outs now that halloween is over.


Patty, Happy Birthday! I hope you like it! Thanks for watching!


Monday, November 1, 2010

Tim Holtz Mini

So here is a video showing the mini album I made at Absolutely Everything. Tim Holtz was charming as ever! Love him! I also am sharing a few pictures from the classes I didn't take. I wish I had taken the Christmas class but, C'est la vie! I got a cinch instead! Enjoy!


This uses beeswax.


Spooky! There is a section with a piece of vellum with a fake tealight candle behind it so it flickers. Very cool looking.


This one is my favorite! I love the tree! So cute!

Sunday, October 24, 2010

Jealous???

OK, please forgive me for what I am about to share. It will make you jealous. I wanted to share what I did today.


I was crafting with Tim Holtz! What a way to spend the day. I am such a class suck up! I brought him some Brachs candy corn (They were out of the autumn mix!). I will have a video showing a few things tomorrow but I wanted to show you some pictures from my amazing day.

It all started at 6:30am. The store Absolutely Everything is an hour away from my house so I had to get up super early. My darling hubby made me an egg sandwich and coffee to go, LOVE HIM! I arrived and there was already a line. I found a lady to sit with and then started sucking up to Tim. He is so sweet and funny in person.

Here are a few pictures of the class I took: Ultimate Grunge
~Tim Teaching


~A section of the product wall and a MAN (yes, a man took the class!)


~My Mini Pages


~Assembling the cover (Amazing how a small work surface can be a great motivator to keep things neat and clean!)


~Putting it all together


The Finished Product - My mini!


I will have a video tomorrow showing my mini up close along with some pictures of the other classes I didn't take. I will also share some info from the class. Thanks to everyone at Absolutely Everything in Topsfield, MA and of course a HUGE thank you to both Mario and Tim. I had an amazing day!